How to Make Stickers with Cricut? [A Complete Guide]
One of the best things about owning a Cricut crafting machine is the ability to design and cut any kind of sticker. You can customize your sticker in any shape, color, or size you can imagine. Stickers are generally creative and versatile; they are great for personalizing your items and useful for business. Making a sticker requires a few extra steps, so if you are ready to move on with the process, here's the complete guide that will help you on how to make stickers with Cricut.
What is Cricut?
A Cricut is an
electronic DIY cutting machine that can cut various materials. Depending on
which Cricut cutting machine you own, crafters can cut many materials like
cardstock, paper, magnets, leather, and more. Cricut has its own software app
called Design Space that helps users design and customize their projects on
their devices before sending them for printing and cutting.
What is Print Then Cut?
Almost every sticker
maker uses a print-then-cut feature, which helps designers design a sticker at
home by using their home printer. Now, put the printed sheets onto an adhesive
mat and run them through a Cricut machine to cut them out. Here are some basic requirements to make a sticker with Cricut.
● Any Cricut machine
● Scissors
● Cricut Mat
● Transfer tape
● Cricut vinyl (Removal or permanent both are
compatible)
● Wedding Tool
How to Make
Stickers with Cricut?
Are you excited about
making a sticker with a Cricut machine? So, without wasting any time, let's get
started.
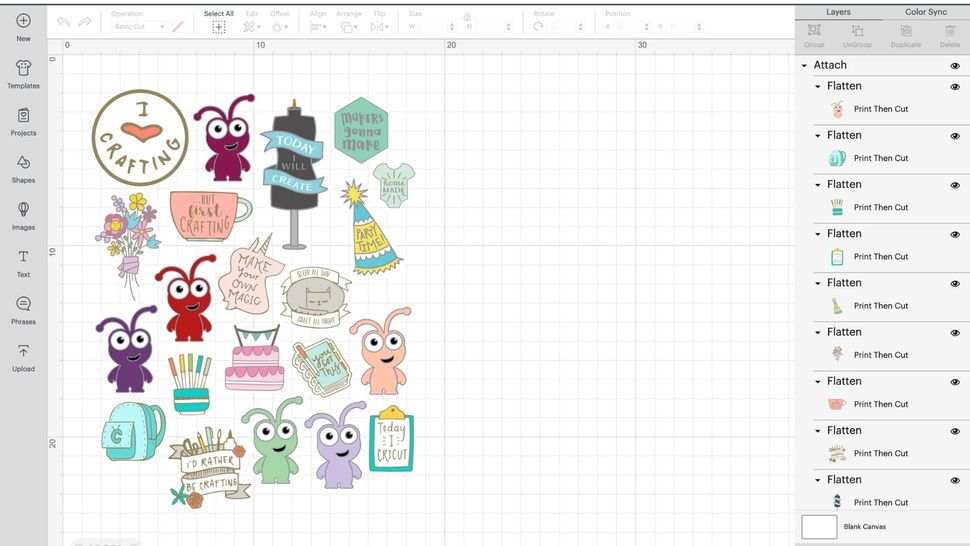
Step 1: Select Your Design in Design Space

- First, you need to open your Design
Space app, then go to the home page,
and click "New Project"
to open a new canvas.
- After that, hit the Image button
on the left side of the screen to bring the image search page. Here, you
can type the name of the sticker.
- Click "Add to Canvas"
to upload them to your workspace.
- Print then cut has a limit size of 6.75X 9.25 inches on an 8.5 X
11-inch sheet material. If you want to ensure your sticker image is fit,
resize it to 6.67 x 9.25 inches.
- Now, highlight the image and make sure you have selected the
print-then-cut option, which you can easily get at the top of the bar.
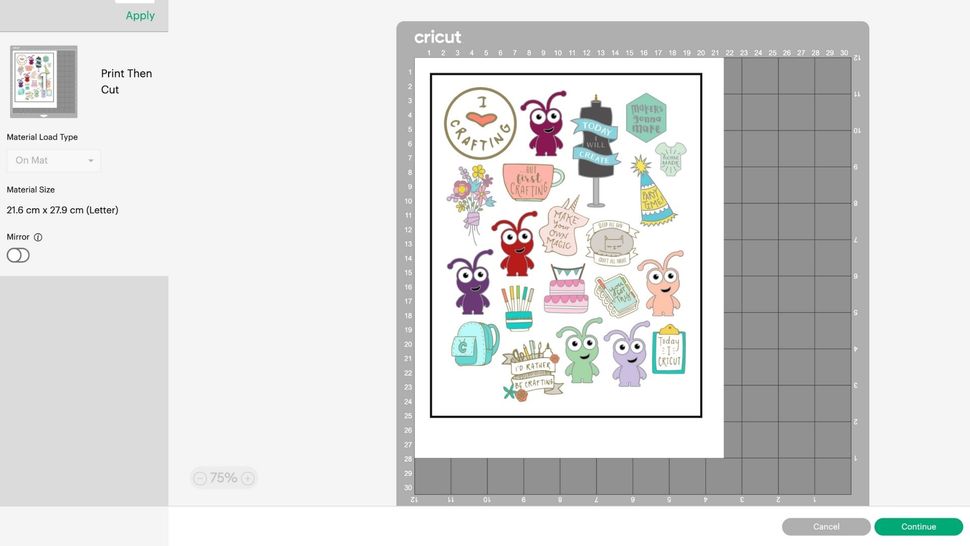
Step 2: Setting up the Printer

- Here, you are 100% ready to make the sticker. If you have your
images in place, select your machine from the top menu. You will see that
a lined black box will surround your design. This box needs to be printed.
- Cricut machines have sensors, so they know exactly where to cut.
- Next, click on the Continue
button to send it to the printer.
- You can also select to turn on the System dialog box, allowing you to access your printer
settings.
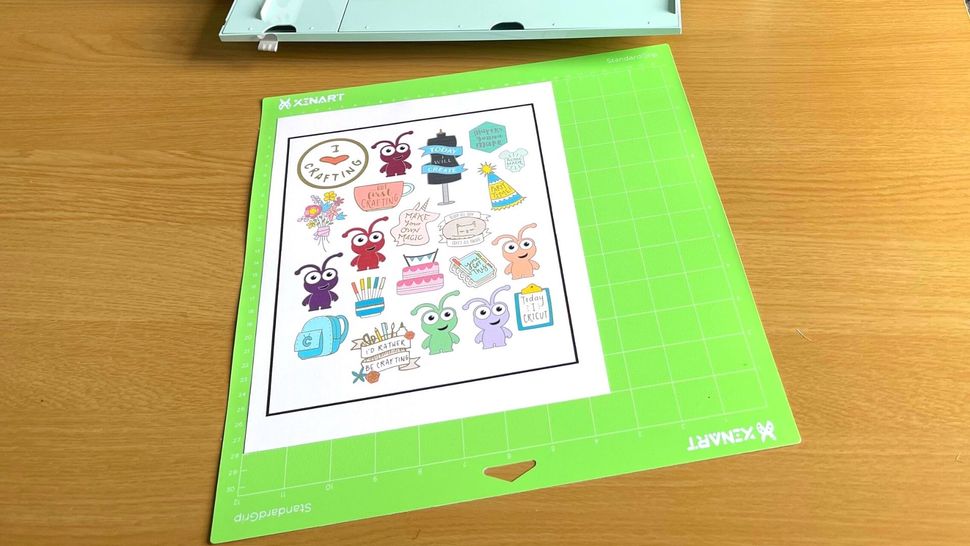
Step 3: Print Stickers and Insert to the Mat

- The next step you have to include is your printer. This method
only runs with an inkjet printer. Add your selected image to the feed and
click to print.
- Once your printer prints the sheet, you need to add it to the mat
carefully.
- If your Cricut machine is compatible with smart materials, you
will still need a mat for this project. Here, we suggest a light gap
because it is removed very easily.
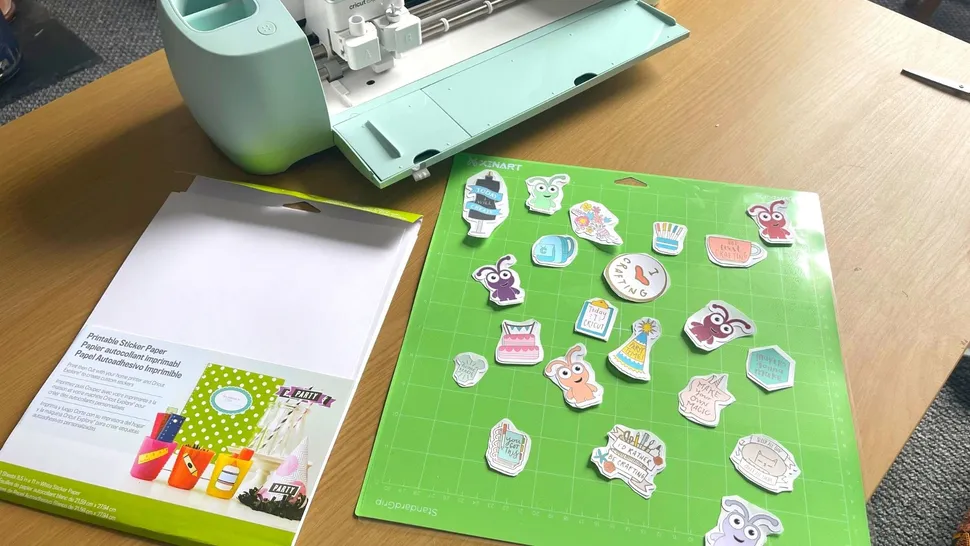
Step 4: Choose Your Material and then Scan

- In your Design Space, you have to select the material type that
you are going to use. Here in this project, we are using sticker paper.
- Simply visit the search bar, then select the settings.
- The next step is to line up your mat and click Go. The Cricut machine will
measure the mat length and cut it out.
- Your stickers will be ready, and you can put them to use wherever
you want on the Cricut machine.

Conclusion
In short, we have
covered the complete process of how to
make stickers with Cricut, which opens up a world of creative
possibilities. Whether you want to personalize your planner, add a unique touch
to gifts, or simply enjoy crafting, Cricut machines make the process easier and
more enjoyable. With different materials and design options, you can turn your
ideas into custom stickers that reflect your personality and style. So, explore
new techniques, and start crafting your own stickers with Cricut today.
FAQs
How Can I Make My Own Sticker to Sell?
Follow the steps to make
your own sticker to sell.
- Firstly, create the image file. Download a pre-loaded sticker and
its image file.
- Now, upload the sticker image to Cricut Design Space.
- After that, you have to print your sticker.
- Next, choose the material that you want.
- And then load the cutting mat.
- After loading the mat, give a command to the Cricut machine to cut
images.
- Now, remove the stickers and unload your mat.
- That’s it; you have finally made your own stickers with Cricut.
What Are the Requirements to Make a Sticker?
First and foremost, you
need a Cricut machine and Design space software to start your sticker project,
and some other requirements are mentioned below.
● Sticker paper
● Inkjet printer
● Cricut Mat
● Cricut machine
● computer/smartphone
● Transfer tape
● Cricut Design Space software
● Weeding tool
● Cricut Vinyl
● Application tool
● Connection with device
Which Printer is Needed to Make a Sticker and Why?
An Inkjet printer is needed to make stickers on Cricut because most of the
stickers are made by the Print-then-cut method, and inkjet supports various
materials and produces high-quality prints without any hassle. We know that you
have to produce stickers in large volumes, and inkjet uses specialized ink that
helps to print good stickers.
Source URL: – How to make stickers with Cricut
Visit – Cricut Design Space


Comments
Post a Comment